
Step by Step: Create a Chatbot with OpenAI & Next.js & Postgres For Free
I went over some of this in my previous post How to store and query your own data using OpenAI Embeddings and Supabase but I'll be doing a complete step by step guide here.
Step 1: Get an OpenAI API Key
Sign up on OpenAI's website if you don't already have an account.
After signing up you can go directly here to create your API key. Save it somewhere safe as you'll need it later. Do not leak this out or commit it in your code accidentally as it can be used to make API calls on your behalf and cause you financial or potentially legal harm.
Step 2: Create a PostgreSQL Database with a Cloud Provider
The important thing to note here is that your Postgres Database of choice must be able to support the extension pgvector.
Two cloud PostgreSQL providers that I recommend that have both generous free tiers to get started as well as support for pgvector are Supabase and Neon.
Today I'm going to use Neon, but if you want to see the equivalent steps for Supabase refer past to my previous post.
Create your project, and you'll receive a PostgreSQL connection string that looks something like this:
postgres://postgres:postgres@localhost:5432/postgres
But instead of localhost, it'll be a domain name that Neon provides you with a different user, passwword, etc. Save this somewhere safe as you'll need it later.
Step 3: Create your Next.js Project with Next-Rails
I'm going to use next-rails to create my Next.js project. You could use the plain create-next-app if you want, but this guide will be taking advantage of some of the dependencies and setup that next-rails handles for you like Knex.js.
npx next-rails new my-chatbot

cd my-chatbot
In next-rails we're using Knex.js to manage our database migrations and seeds. The dependencies will already be installed for you and configured already if you use next-rails.
Optional Step: Local Development with Docker
If you want to develop locally with Docker you can use the docker files that next-rails provides to spin up both Next.js and PostgreSQL (w/ pgvector) containers.
docker compose up
The default .env.local is setup with the correct environment variables to connect to the local PostgreSQL container, though you'll need to add your OpenAI API key in the next step.
Step 4: Setup your environment variables
Open up your .env.local at the root of your Next.js project and add the following environment variables:
OPENAI_API_KEY=your-openai-api-key-from-step-1
DATABASE_URL=your-postgres-connection-string-from-step-2
NOTE: Very important for neon you need to add ?sslmode=require to the end of your DATABASE_URL. So it should look like this:
OPENAI_API_KEY=your-openai-api-key-from-step-1
DATABASE_URL=postgres://postgres:postgres@localhost:5432/postgres?sslmode=require
Step 5: Enable PgVector in your PostgreSQL Database and Create a Table to Store your Data
On Neon, and in the default PostgreSQL setups if you want to enable pgvector you have to run a SQL command:
CREATE EXTENSION pgvector;
You "could" just go to the Neon console and run this manually (or Supabase has a checkbox to enable extensions on their site) but I prefer to have everything in code so I can easily recreate my database if I need to. That's why we're using Knex migrations.
With next-rails we can use the magic of scaffolding to generate a migration that enables pgvector for us as well as create a table to store our data.
 npx next-rails g scaffold Post title:string body:text embedding:vector
Generating scaffold Post...
📁 Creating directory...
✅ File /home/matt/working/pgtest/src/db/models/post.ts written successfully
✅ File /home/matt/working/pgtest/src/pages/api/posts.ts written successfully
✅ File /home/matt/working/pgtest/src/db/migrations/20230604224116_create_posts.js written successfully
✅ File /home/matt/working/pgtest/src/pages/posts/index.tsx written successfully
Let's break down the command:
 npx next-rails g scaffold # Generate a scaffold, which is a model, api route, migration, and page

 Post # Our model name, this our db table name will be the plural, lowercase version of this "posts"

 title:string # Our first column, the name of the column is "title" and the type is "string"

 body:text # Our second column, the name of the column is "body" and the type is "text"

 embedding:vector # Our third column, the name of the column is "embedding" and the type is "vector"
Now we can run the migration it made for us with:
npx next-rails db:migrate
Step 6: Seed your Database with Data
Now that we have a table to store our data, let's seed it with some data. You can create a new seed file with:
npx next-rails seed:generate seed-posts
This will create a new file in db/seeds that looks like this:
/**
 * @param { import("knex").Knex } knex
 * @returns { Promise<void> }
 */
exports.seed = async function (knex) {
  // Deletes ALL existing entries
  await knex('table_name').del();
  await knex('table_name').insert([
    { id: 1, colName: 'rowValue1' },
    { id: 2, colName: 'rowValue2' },
    { id: 3, colName: 'rowValue3' },
  ]);
};
Our seed is going to be a little complicated as we're going to be using the OpenAI API to generate our embeddings before we insert them into our database.
First, let's install the openai and dotenv packages:
npm install --save openai dotenv
Now we can update our seed file to look like this:
/* eslint-disable @typescript-eslint/no-var-requires */
require('dotenv').config();
const { Configuration, OpenAIApi } = require('openai');

const configuration = new Configuration({
  apiKey: process.env.OPENAI_API_KEY,
});

const openai = new OpenAIApi(configuration);

/**
 * @param { import("knex").Knex } knex
 * @returns { Promise<void> }
 */
exports.seed = async function (knex) {
  // Deletes ALL existing posts
  await knex('posts').del();

  // Define the array of posts
  const posts = [
    { title: 'Post 1', body: 'Hamburgers' },
    { title: 'Post 2', body: 'Bananas' },
    // Add more posts here...
  ];

  for (const post of posts) {
    // Call OpenAI API to create the embedding
    const embeddingResponse = await openai.createEmbedding({
      model: 'text-embedding-ada-002',
      input: post.body,
    });
    const [{ embedding }] = embeddingResponse.data.data;

    // Prepare the embedding for insertion
    const embeddingString = `'${JSON.stringify(embedding)}'`;

    // Insert the post into the posts table
    await knex.raw(
      `
          INSERT INTO posts (title, body, embedding)
          VALUES (?, ?, ${embeddingString})
        `,
      [post.title, post.body]
    );
  }
};
This is a little different from a typical seed file because it's not just some static data that we're inserting into our database. We're actually calling the OpenAI API to generate the embeddings for us.
If your data is very lengthy and you don't want to in-line it in your seed file you can store it in a separate file and read it in with fs like so:
/* eslint-disable @typescript-eslint/no-var-requires */
require('dotenv').config();
const { Configuration, OpenAIApi } = require('openai');
const fs = require('fs');

const configuration = new Configuration({
  apiKey: process.env.OPENAI_API_KEY,
});

const openai = new OpenAIApi(configuration);

/**
 * @param { import("knex").Knex } knex
 * @returns { Promise<void> }
 */
exports.seed = async function (knex) {
  // Deletes ALL existing posts
  await knex('posts').del();

  // Read the array of posts from the JSON file
  const posts = JSON.parse(fs.readFileSync('./posts.json', 'utf8'));

  for (const post of posts) {
    // Call OpenAI API to create the embedding
    const embeddingResponse = await openai.createEmbedding({
      model: 'text-embedding-ada-002',
      input: post.body,
    });
    const [{ embedding }] = embeddingResponse.data.data;

    // Prepare the embedding for insertion
    const embeddingString = `'${JSON.stringify(embedding)}'`;

    // Insert the post into the posts table
    await knex.raw(
      `
      INSERT INTO posts (title, body, embedding)
      VALUES (?, ?, ${embeddingString})
    `,
      [post.title, post.body]
    );
  }
};
Either way, now we can run the seed with:
npx next-rails db:seed
Assuming you have no errors, you should now have some data in your database, and each post should have an embedding column with an OpenAI embedding.
To validate that your table is setup correctly and you have data in it, you can use the startup your Next.js app and visit the posts page to see the data.

Step 7: Query your Data
To recap: we have a table in our database with some data in it, and each row has an OpenAI embedding. Now we need to create an API route that will take a query string and return the most similar post to that query.
Before we make an API Route, we need to create a postgres function to find the closest embedding to a given embedding. That's the magic behind RAG (Retrieval Augmented Generation) and the OpenAI API.
Make a new migration:
npx next-rails migration:generate match-posts-function
In our migration add the following code:
/**
 * @param { import("knex").Knex } knex
 * @returns { Promise<void> }
 */
exports.up = function (knex) {
  return knex.raw(`
    create or replace function match_posts (
      query_embedding vector(1536),
      match_threshold float,
      match_count int
    )
    returns table (
      id uuid,
      body text,
      title text,
      similarity float
    )
    language sql stable
    as $$
      select
        posts.id,
        posts.body,
        posts.title,
        1 - (posts.embedding <=> query_embedding) as similarity
      from posts
      where 1 - (posts.embedding <=> query_embedding) > match_threshold
      order by similarity desc
      limit match_count;
    $$;

    create index on posts using ivfflat (embedding vector_cosine_ops)
    with
      (lists = 100);
  `);
};

/**
 * @param { import("knex").Knex } knex
 * @returns { Promise<void> }
 */
exports.down = function (knex) {
  return knex.raw(`
    drop function match_posts;
  `);
};
This finds the n (match_count) number of matches, sorted by similarity, for a given similarity threshold (match_threshold). It also creates an index on the embedding column to speed up the query.
Yet again let's run our migration:
npx next-rails db:migrate
Now we can create a Next.js API route to query our data. Create a new file at pages/api/query.ts with the following code:
import type { NextApiRequest, NextApiResponse } from 'next';
import { Configuration, OpenAIApi } from 'openai';
import { getKnex } from '@deps/db';

const knex = getKnex();

const configuration = new Configuration({
  apiKey: process.env.OPENAI_API_KEY,
});

const openai = new OpenAIApi(configuration);

export default async function handler(
  req: NextApiRequest,
  res: NextApiResponse
) {
  if (req.method !== 'POST') {
    res.setHeader('Allow', ['POST']);
    res.status(405).end(`Method ${req.method} Not Allowed`);
    return;
  }

  try {
    const { query, previousMessages } = req.body;
    if (!query) {
      res.status(400).json({ error: 'Missing query' });
      return;
    }

    const input = query.replace(/\n/g, ' ');
    const embeddingResponse = await openai.createEmbedding({
      model: 'text-embedding-ada-002',
      input,
    });
    const [{ embedding }] = embeddingResponse.data.data;

    const matchThreshold = 0.78;
    const matchCount = 10;

    const sql = `SELECT * FROM match_posts(ARRAY[${
      '??,'.repeat(embedding.length - 1) + '??'
    }]::vector(1536), ?, ?)`;
    const bindings = [...embedding, matchThreshold, matchCount];

    const { rows: posts } = await knex.raw(sql, bindings);

    let postsText = '';
    for (const post of posts) {
      postsText += `\nTitle: ${post.title}\nBody: ${post.body}\n`;
    }

    let previousQuestionsText = '';
    for (const message of previousMessages) {
      previousQuestionsText += `\nPrevious Question: ${message}`;
    }

    const systemMessage = `
      You are a friendly and knowledgeable chatbot, trained to provide accurate answers using the information found in your Context. Answer the question using only that information. Please answer in a conversational and factual manner, including the relevant information from the Context provided. If the answer is not explicitly written in the Context, say "Sorry, I can't help you with that."

      Context:
      ${postsText}

      Previously asked questions:
      ${previousQuestionsText}
    `;

    const userMessage = `Question: "${query}"`;

    console.log('systemMessage', systemMessage);
    console.log('userMessage', userMessage);

    // Now we can pass our messages to the gpt-3.5-turbo model to get our completion (result)
    const chatResponse = await openai.createChatCompletion({
      model: 'gpt-3.5-turbo',
      messages: [
        {
          role: 'system',
          content: systemMessage,
        },
        {
          role: 'user',
          content: userMessage,
        },
      ],
      max_tokens: 2048,
      temperature: 0.2,
    });

    if (
      !chatResponse.data.choices ||
      !chatResponse.data.choices[0]?.message?.content
    ) {
      throw new Error(
        'There was a problem when asking your question, please try again.'
      );
    }

    const {
      id,
      choices: [
        {
          message: { content: text },
        },
      ],
    } = chatResponse.data;

    res.status(200).json({ id, text });
  } catch (error) {
    console.error(error);
    if (error instanceof Error) {
      res.status(500).json({ error: error.message });
    } else {
      res.status(500).json({ error: 'An unknown error occurred.' });
    }
  }
}
Step 8: Create a UI to Query your Data
Here is an example you can toss into src/pages/index.tsx to replace the default Next.js homepage:
import { useState, useRef, useEffect, FormEvent } from 'react';
import Head from 'next/head';

type Message = {
  text: string;
  from: 'user' | 'bot';
  id: string;
};

const Chat = () => {
  const [messages, setMessages] = useState<Message[]>([]);
  const [loading, setLoading] = useState(false);

  // Reference to the chat box
  const chatBoxRef = useRef<HTMLDivElement | null>(null);

  // Scroll to bottom of chatbox upon new messages
  useEffect(() => {
    if (chatBoxRef.current) {
      chatBoxRef.current.scrollTop = chatBoxRef.current.scrollHeight;
    }
  }, [messages]);

  // Fetch the response to the question
  const askQuestion = async (query: string) => {
    setLoading(true);

    try {
      // Get the last 5 messages sent by the user
      const previousMessages = messages
        .filter((message) => message.from === 'user')
        .map((message) => message.text)
        .slice(-5);

      const res = await fetch('/api/query', {
        method: 'POST',
        headers: { 'Content-Type': 'application/json' },
        body: JSON.stringify({ query, previousMessages }),
      });
      const data = await res.json();

      if (data.error) {
        setMessages((prev) => [
          ...prev,
          {
            text: 'Sorry, there was an issue with your request. Please try again.',
            from: 'bot',
            id: `bot_${Date.now()}`,
          },
        ]);
      } else if (data.id && data.text) {
        // Add the response to the messages
        setMessages((prev) => [
          ...prev,
          { text: data.text, from: 'bot', id: data.id },
        ]);
      }
    } catch (error) {
      setMessages((prev) => [
        ...prev,
        {
          text: 'Sorry, there was an issue with your request. Please try again.',
          from: 'bot',
          id: `bot_${Date.now()}`,
        },
      ]);
    }

    setLoading(false);
  };

  // Handle when the user submits a question
  const handleSubmit = (e: FormEvent<HTMLFormElement>) => {
    e.preventDefault();

    const input = e.currentTarget.querySelector('input') as HTMLInputElement;

    // Add the user's question to the messages immediately
    const query = input.value;
    setMessages((prev) => [
      ...prev,
      { text: query, from: 'user', id: `user_${Date.now()}` },
    ]);

    // Fetch the response and clear the input
    input.value = '';
    askQuestion(query);
  };

  return (
    <>
      <Head>
        <title>ChatBot</title>
      </Head>
      <main className="p-4">
        <h1 className="mb-4 text-center text-2xl font-semibold">ChatBot</h1>

        <div
          ref={chatBoxRef}
          className="mx-auto flex h-[500px] flex-col items-stretch space-y-3 overflow-auto rounded border bg-gray-50 p-4"
        >
          {messages.map((message) => (
            <div
              key={message.id}
              className={`text-${
                message.from === 'user' ? 'right' : 'left'
              } rounded-lg p-2 bg-${
                message.from === 'user'
                  ? 'blue-500 text-white'
                  : 'green-200 text-black'
              }`}
            >
              {message.text}
            </div>
          ))}
        </div>

        <form className="mt-4" onSubmit={handleSubmit}>
          <input
            required
            type="text"
            className="w-full rounded border p-2"
            placeholder="Ask a question..."
          />
          <button
            type="submit"
            className="mt-2 w-full rounded bg-blue-500 p-2 text-white"
            disabled={loading}
          >
            {loading ? 'Loading...' : 'Ask'}
          </button>
        </form>
      </main>
    </>
  );
};

export default Chat;
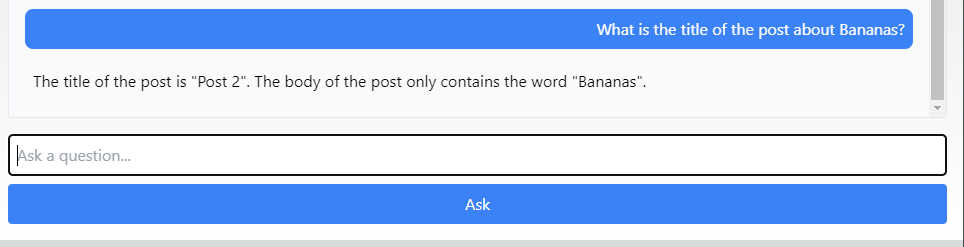
Let's visit the page and try asking a question about one of our posts:
Step 9: Deploy your App
The easiest way to deploy your app is to use Vercel. You can sign up with your GitHub account and deploy your app in seconds. I recommend following their deployment guide here.
Make sure you add your environment variables to your Vercel project. You can do this by going to your project's settings and adding them under the "Environment Variables" section. You'll need your OPENAI_API_KEY and DATABASE_URL.
Conclusion
You're done! You now have a chatbot that can answer questions about your data. I highly recommend playing around with your match_threshold, match_count, and the temperature of the GPT model to get the best results for your use case. You can definitely swap out gpt-3.5-turbo for a different model if you want to experiment with that as well. At the time of this writing gpt-4 is still waitlist only and it's much more expensive.
Happy coding!
If you found this post helpful, feel free to connect with me on LinkedIn. Please let me know if you have any questions or feedback!